Ben-Shahar Lab CRISPR/RMCE Protocol May 2015
*This protocol describes the 2 step process used for generating Drosophila CRISPR constructs. In the first step, sgRNAs flanking a genomic region of interest mediate the targeted insertion of a cassette containing attP sites for recombination in step 2, and dsRed expressed under the eye-specific promoter P3 for easy screening. In the second step, the previously inserted attP sites ate used for targeted recombinase-mediated cassette exchange (RMCE), a high efficiency step for insertion of your sequence of choice. Here, recombination replaces the dsRed sequence, allowing screening for the lack of dsRed expression. This protocol is especially useful for making multiple transgenic lines with manipulations in the same genetic region.
- Before you begin
- Useful CRISPR overview for beginners: https://www.addgene.org/CRISPR/guide/
- This protocol combines techniques described in these 2 papers:
- Zhang X, Koolhaas WH, Schnorrer F. A Versatile Two-Step CRISPR- and RMCE-Based Strategy for Efficient Genome Engineering in Drosophila. G3 (Bethesda). 2014 Oct 15;4(12):2409-18. doi: 10.1534/g3.114.013979. PubMed PMID: 25324299.
- Gokcezade J, Sienski G, Duchek P. Efficient CRISPR/Cas9 Plasmids for Rapid and Versatile Genome Editing in Drosophila. G3 (Bethesda). 2014 Sep 17;4(11):2279-82. doi: 10.1534/g3.114.014126. PubMed PMID: 25236734; PubMed Central PMCID: PMC4232553.
*This protocol describes the use of a readily available plasmid from which both sgRNAs and Cas9 can be produced in vivo. This allows for injection into any fly strain, rather than requiring a line that transgenically expresses Cas9.
STEP 1:
- Design oligos
- sgRNA target sequences
- 20 nucleotide sequence from genomic region of interest that is adjacent to PAM site (NGG). Make sure to not include PAM site in ordered oligos (even though this is included in the target sequences displayed when using some online tools).
- Design sgRNA target sequences flanking a targeted genomic region (2 sgRNA sites). As in Zhang et al. 2014, we have targeted up to ~1 kb region, and are currently planning to try targeting larger regions. We have had success using multiple sgRNAs simultaneously (2 for each site, 4 in total). For this design, sgRNAs should be located in or within 10 base pairs of introns. A useful website for finding sgRNA template sequences in introns is here: http://www.flyrnai.org/crispr2/
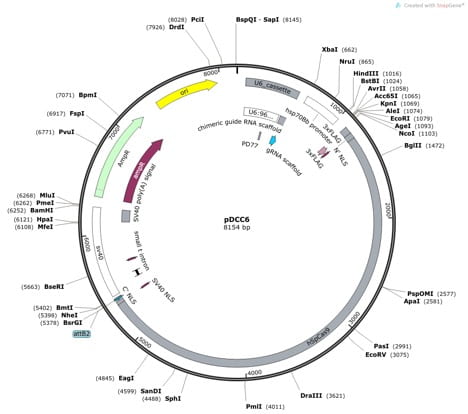
- Each sgRNA target sequence will be ligated into the pDCC6 vector (which encodes Cas9, and allows in vivo transcription of sgRNAs; available from addgene #59985). The pDCC6 vector will be cut with BbsI for ligation of sgRNA sequences, so to make this ligation easy, include appropriate overhangs when ordering sgRNA template oligos. (Look at Gokcezade et al., 2014, Figure 1)
- Oligo design
- sgRNA target sequences
5’ CTTCGNNNNNNNNNNNNNN
CNNNNNNNNNNNNNNCAAA 3’
(CTTC and CAAA are complimentary to the overhangs created from BbsI digest of pDCC6 vector, G and complimentary C are needed for RNA Pol III to transcribe sgRNA, N’s = sgRNA target sequence and compliment)
- For each sgRNA, order 2 oligos (with overhangs shown in step iv). These will be annealed and inserted into the pDCC6 vector.
- Homology arms
- should be approx. 1 Kb in length. The end of the homology arm should ideally be within 10 bps of the sgRNA target sequence. Make sure the sgRNA and adjacent PAM sequence are not included in the homology arms, otherwise Cas9 can cut the homology arm plasmid. Make sure homology arms are designed so that the break point for insertion of the dsRed construct does not disrupt exon sequence (or splice donor/acceptor sites- the two base pairs within introns that are adjacent to exon sequences). In your final transgenic line, extra sequence will be left at these breakpoints.
- Homology arms will be cloned into a plasmid using a golden gate reaction. (Helpful overview if you are unfamiliar with this technique https://www.neb.com/applications/cloning-and-synthetic-biology/gene-assembly/golden-gate-assembly)
- Golden Gate cloning design:
- GGAC – left homology arm –
– left homology arm – GGTC
- CCAG – dsRed construct –
– dsRed construct – ACAA
- TGTT – right homology arm –
– right homology arm – GCAT
- CGTA – pXZ13 backbone –
– pXZ13 backbone – CCTG
Final plasmid all together will look like this:

- Plasmids:
- pJet1.2-STOP-dsRed construct is available from addgene (plasmid #60944)
- pXZ13 backbone from addgene (pBS-GGAC-ATGC, plasmid #60949)
- Oligos for homology arm cloning should be designed to include both:
- primer sequence to clone the homology arm
- BsmbI site + appropriate overhang for golden gate cloning
- Homology Arm Oligo templates:
- Left homology arm forward primer: cacaccacgtctcaggacNNNNNNNNNNNNNNNNNNNN
- Left homology arm reverse primer: cacaccacgtctcactggNNNNNNNNNNNNNNNNNNNN
- Right homology arm forward primer: cacaccacgtctcatgttNNNNNNNNNNNNNNNNNNNN
- Right homology arm reverse primer: cacaccacgtctcagcatNNNNNNNNNNNNNNNNNNNN
(BsbmBI site, Overhang sequence, N’s = your specific PCR primer sequence)
- Insert sgRNA template oligos into pDDC6 plasmid
- Phosphorylate sgRNA template oligos
- .5 uL of 100uM oligo (50 pmol)
- 2 uL 10x T4PK buffer (thermos scientific T4PK Buffer A)
- 2 uL 10 mM ATP (not included in buffer)
- 1 uL T4 Polynucleotide Kinase
- 14.5 uL H20
- 20 uL total
- Incubate at 37 degrees of 20 minutes, then 75 degrees for 10 mins (for heat inactivation of T4PK)
- Anneal oligos for sgRNA template
- 10 uL of each phosphorylation rxn for complimentary oligos
- .5 uL T4 ligase buffer
- 4.5 uL H2O
- 25 uL total
- Annealing reaction- in the PCR machine:
- 95 degrees for 5 mins
- Cycle: start at 95 degrees for 1 minute, each cycle decrease 1 degree for 70 cycles
- 4 degree hold
- Alternatively, the annealing reaction can be done in a heat block (or water bath), by incubating for 10 mins at 85, then turn off heat, and leave tubes while heat block cools (for 30 mins-1 hr)
- Estimated concentration should be ~ 9.24 ng/ul (calculated using Promega biomath pmol to ug calculator)
- Add 225 uL of water to each sample for total of 250 uL, and approx. concentration .924 ng/uL
- Digest pDCC6 plasmid with BbsI
- 15 uL miniprep
- 5 uL BbsI enzyme (this enzyme is stored at -80)
- 5 uL NEBuffer 2.1
- 25 uL H20
- Total 50 uL rxn
- Incubate at 37 degrees (2-4 hrs), then 65 degrees for 20 mins (heat inactivation of BbsI).
- Add 1 uL CIP for dephosphorylation, incubate 37 degrees 1 hr.
- Run on 1% gel and cut out band, gel digest.
- Ligation
- NEBio Ligation Calculator is helpful
- set up 20 uL reactions using T4 DNA ligase and buffer
- 1:3 and 1:5 vector:insert ratios both worked well, using 70-100 ng of vector
- Recommended rxn:
- .94 uL pDCC6-1 vector (70 ng)
- 1.3 uL annealed oligos (1.335 ng) (5:1 ratio)
- 2 uL T4 ligase buffer
- 1 uL T4 ligase enzyme
- 15 uL H2O
- 20 uL total rxn volume
- PCR machine: 22 degrees 1 hr, 70 degrees 5 mins.
- Transformation
- 5 uL ligation reaction + 50 uL TOP 10 cells
- Ice 30 mins, 42 degrees 30 sec, ice 5 mins, add 950 uL room temp SOC along with cells into culture tube, shake for 1 hr. Plate 30 uL. (all plasmids are amp resistant, plate with amp or carb)
- Miniprep and check sequence using pDCC6 5’sequencing primer (144 base pairs upstream of BsbI sites): CGAACTGTGTTTTCAACAAACG
- Make sure the sgRNA is sequence is correct. Make sure the TTTT following sgRNA sequence is intact (this is the stop sequence for Pol III).
- Phosphorylate sgRNA template oligos
- Clone Homology Arms
- Obtain DNA template to clone homology arms (ideally this should be the strain you plan to inject into to make your crispr transgenic fly). Use a DNA isolation protocol.
- For PCR reaction, use a high fidelity polymerase. Blunt ends are needed to insert into pJET vector (or you can do a blunting rxn).
- Each rxn:
- 2.5 uL accuprime mix
- 1.5 uL 10 uM primer mix (4 uL of each primer 100 uM + 32 uL H2O)
- .5 uL DNA template (~200 ng/uL)
- .4 uL accuprime enzyme
- 19.5 uL H2O
- 25 uL total
- PCR reaction
- 95 degrees 2 mins
- 35 cycles:
- 95 degrees 15 sec
- 71 degrees 30 sec (for primer Tm’s 74-75, adjust accordingly)
- 68 degrees 1 min, 20 secs (for PCR products ~ 1 kb)
- 68 degrees 5 mins
- 4 degrees
- Troubleshooting suggestions for more difficult primer pairs: 200 ng template DNA, 1 uL accuprime enzyme, lower annealing temp (try a gradient PCR reaction), and/or .8 uL MgSO4 per rxn.
- Gel extract (if multiple bands) or PCR cleanup (if single, clean band)
- Insert Homology Arms into pJET vector
- Or any other vector should work. We use cloneJET PCR cloning kit from life technologies (K1231)
- Set up ligation rxn on ice:
- 10 uL 2x rxn buffer (comes with pJET kit)
- 25 ng PCR insert
- 25 ng pJET1.2 cloning vector (.5 uL)
- 1 uL T4 DNA ligase
- 8 uL H2O
- 20 uL total
- Incubate at room temp for 10 mins.
- Transform 2.5 ul (as above), miniprep and check sequences.
*Alternatively, you can skip step 5, and the PCR reaction product from 4 can be used for the golden gate reaction in Step 6. We’ve had almost 100% success rate including step 5, about 50% success skipping step 5.
- Engineer plasmid containing DSRed reporter in between homology arms
- Golden Gate reaction
- 50 ng backbone (pXZ13)
- 80 ng pJET1.2-STOP-dsRED
- 80 ng homology arm left
- 80 ng homology arm right
- 1.5 uL 10x T4 Ligase Buffer
- 1 uL T4 Ligase Enzyme
- 1 uL BsmBI
- Water to 15 uL total volume
- (Note: thermoscientific T4 DNA ligase and buffer with NEB BsmBI enzyme works fine.)
- Protocol:
- 15 cycles: 37 degrees for 15 mins, 16 degrees for 10 mins
- 37 degrees for 15 mins
- 50 degrees for 5 mins
- 80 degrees for 5 mins
- 4 degree hold
- Transform 5 uL of golden gate reaction
- Golden Gate reaction
- Prepare plasmids for injection
Suggested final concentrations of plasmids are 60-100 ng/ul for pDCC6 plasmids with sgRNA template insert, and 500 ng/ul for the DSRed plasmid resulting from golden gate reaction. It is recommended that total concentration of injection mixture remains at or below 1000 ng/ul
- Screening Flies
Injected flies should be individually crossed to a balancer line for the appropriate chromosome. Collect the offspring of these crosses (F1), and screen for fluorescent red eyes. Those that are positive should be considered separate lines. Each should be crossed to the balancer line. PCR screen offspring to confirm insertion location of transgene.
STEP 2:
In the second step, the inserted attP sites will be used for targeted recombinase-mediated cassette exchange (RMCE) as in Zhang et al., 2014.
- The attB plasmid used here is available from the Drosophila Genomics Resource Center (DGRC). pBS-KS-attB1-2-PT-SA-SD-0, stock #1297, originally from Hugo Bellen, Baylor College of Medicine.
- Order double stranded DNA for insertion
- Double stranded DNA up to 2 kb can be ordered as a gblock from IDT. Design gblock for easy insertion into attB plasmid, with XBaI site at the beginning, and HindIII site at the end.
- Insert double stranded DNA into attB plasmid
- Double digest both attB plasmid and ordered gBlock with XBaI and HindIII.
- Gel extraction
- Ligation reaction
- Transformation
- Miniprep and check sequence
- Plasmids for injections:
Inject a cocktail of engineered attB plasmid (150 ng/ul), and vasa ΦC31 plasmid (200 ng/ul) (addgene plasmid #60948 p3XP3-EGFP.vas-int.NLS) into embryos from transgenic line developed in Step 1.
- Screening Flies
Collect and cross flies as for Step 1. Screen F1 flies for those lacking dsRed expression.
Questions? Feel free to email alexis.s.hill@wustl.edu
Ben Shahar lab Scarless CRISPR Protocol July 2017
Useful CRISPR overview: https://www.addgene.org/CRISPR/guide/
Overview of scarless strategy: http://flycrispr.molbio.wisc.edu/scarless
Protocol developed by Kate O’Connor Giles lab at Wisconsin. Use sgRNAs (at 1 or 2 sites) to cut open genomic region of interest. Use a donor plasmid that contains dsRed eye marker surrounded by piggy bac transposon recognition sites, inserted at a TTAA genomic sequence. After insertion, use PBac Transposase to remove dsRed marker. This transposase leaves a TTAA scar, however if this is lined up with TTAA in genomic sequence, final product is scarless.

(from http://flycrispr.molbio.wisc.edu/scarless) ApE file for pHD-ScarlessDsRed plasmid can be downloaded from website.
Background reading on piggyback transposase:
http://blog.addgene.org/piggybac-ing-through-the-genome-editing-field
See section titled “How does piggyBac enhance gene editing?”
Generation of pBac transposase lines is described in Thibault et al., Nature Genetics, 2004 https://www.nature.com/ng/journal/v36/n3/full/ng1314.html
Overview:
There are 2 types of plasmids that need to be made. 1) Plasmids that contain your sgRNA sequences and Cas9. You will have 1 plasmid for each sgRNA. 2) The donor plasmid, which includes the dsRed marker, between homology arms that will target your region of interest. You will have only 1 donor plasmid.
Additional things:
- If you will have Paula do your injections, she likes to be notified ~1 month in advance so she can expand the appropriate fly line for injection. As of now, we’ve been injecting into yw flies, which has worked well. If everything works perfectly, it should hypothetically take 10 days from ordering your oligos to injecting embryos, however our experience is that this typically takes about a month.
- When you collect injected flies at the end of the 1st step, you will want to cross them to a balancer line for the chromosome you are targeting. Make sure that we have an appropriate line, and expand if necessary.
- Design oligos
- sgRNA target sequences
- 20 nucleotide sequence from genomic region of interest that is adjacent to PAM site (NGG). Make sure to not include PAM site in ordered oligos (even though this is included in the target sequences displayed when using some online tools).
- Design sgRNA target sequences flanking targeted genomic region (2 sgRNA sites). We have had success using multiple sgRNAs simultaneously (ie 2 overlapping sgRNAs for each site, 4 in total).
- A useful website for finding sgRNA template sequences in introns is here: http://www.flyrnai.org/crispr2/
- sgRNA target sequences
Here’s a helpful example from IDT (the sgRNA sequence is in green):

- Each sgRNA target sequence will be ligated into the pDCC6 vector (which encodes Cas9, and allows in vivo transcription of sgRNAs; available from addgene #59985). The pDCC6 vector will be cut with BbsI for ligation of sgRNA sequences, so to make this ligation easy, include appropriate overhangs when ordering sgRNA template oligos. (Look at Gokcezade et al., 2014, Figure 1)
- For each sgRNA, order 2 oligos as shown below. (Each ordered oligo starts at 5’ end). These will be annealed and inserted into the pDCC6 vector.
Oligo design:
5’ CTTCGNNNNNNNNNNNNNN
CNNNNNNNNNNNNNNCAAA 5’
(CTTC and CAAA are complimentary to the overhangs created from BbsI digest of pDCC6 vector, G and complimentary C are needed for RNA Pol III to transcribe sgRNA, N’s = sgRNA target sequence and compliment. N’s in top oligo correspond to green agRNA in example above. N’s in bottom oligo are complimentary.)
- *Before ordering the sgRNA oligos, I strongly suggest that you sequence this region in the fly line in which you will be injecting, to make sure there aren’t any differences from the reference genome. A difference of 1-2 nucleotides in this sequence can prevent proper binding of the sgRNA.
- Left and Right sides for donor plasmid
- Design left and right sides for your donor plasmid, which will flank the dsRed. Each ‘side’ will include a homology arm (about 1 kb outside of the sgRNA site) as well as the replaced genomic sequence between the sgRNA site and the TTAA where the dsRed will be inserted.
- **sgRNA/PAM sites must be mutated in the donor plasmid so that Cas9 cannot cut the donor plasmid or inserted sequence. This is typically done by mutating one of the Gs of the PAM.
- **Make sure your homology arms do not contain a BSMBI site (cgtctc).
- These ‘sides’ will be assembled into the donor plasmid along with the dsRed and a backbone using a golden gate reaction. (Helpful overview if you are unfamiliar with this technique https://www.neb.com/applications/cloning-and-synthetic-biology/gene-assembly/golden-gate-assembly)
- Golden Gate cloning design:
GGAC – left side –
– left side – AATT
TTAA – scarless dsRed construct –
– scarless dsRed construct – TCCC
AGGG – right side –
– right side – TACG
ATGC – pXZ13 backbone –
– pXZ13 backbone – CCTG
- Plasmids:
- Scarless dsRed construct: dsRed between piggybac recognition sequences was PCR amplified from pHD-ScarlessDsRed (DGRC #1364), bsmbI sites were added to provide the appropriate overhangs, and this was inserted into a pJet vector.
- pXZ13 backbone from addgene (pBS-GGAC-ATGC, plasmid #60949)
- Designing each side: Figure out how you will make each side. One option is to fully synthesize each side. Another option is to use gBlocks, or a combination of gBlocks and PCR, for example using PCR to amplify the homology arms, and ordering gBlocks for replacing genomic region between the sgRNA and TTAA and then fusing these together. (A protocol for fusing gBlocks together, or gBlocks and PCR products is included at the end of this protocol)
- Ends of Left and Right sides: These must be precisely designed to include BsmBI sites and the appropriate overhangs for the Golden Gate reaction. If you are order these as oligos, this is what they should look like (first half of each is written exactly how it should be ordered):
- Left side forward primer:
cacaccacgtctcaggacNNNNNNNNNNNNNNNNNNNN
- Left side reverse primer (ttaa included here should line up with genomic TTAA):
cacaccacgtctcattaaNNNNNNNNNNNNNNNNNNNN
- Right side forward primer (TTAA included here should line up with genomic TTAA):
cacaccacgtctcaagggTTAANNNNNNNNNNNNNNNN
- Right side reverse primer:
cacaccacgtctcagcatNNNNNNNNNNNNNNNNNNNN
(BsbmBI site, Overhang sequence, N’s = your specific PCR primer sequence)
If you order synthesized sequences, use the reverse compliment of the reverse primer sequences written above.
Once oligos are ordered step 2 can be completed in parallel with steps 3-4.
- Insert sgRNA template oligos into pDDC6 plasmid
Before you start:
- Check whether we have any T4PNK (Polynucleotide kinase) in the lab (usually in one of the blue freezer boxes). If not, you can get it from the stockroom, but they often run out.
- Check for pDCC6 plasmid. Ideally there is some already digested that you can use, or a midiprep that you can digest from. Check in the box labeled ‘CRISPR plasmids’ in Alexis’ rack in the -20 freezer (bottom shelf on the left). If you use the last of either the digested plasmid, or the midiprep, let Alexis know. If you need to digest more plasmid:
- Digest pDCC6 plasmid with BbsI
- 15 uL miniprep
- 5 uL BbsI enzyme (this enzyme is stored at -80)
- 5 uL NEBuffer 2.1
- 25 uL H20
- Total 50 uL rxn
- Incubate at 37 degrees (2-4 hrs), then 65 degrees for 20 mins (heat inactivation of BbsI).
- Add 1 uL CIP for dephosphorylation, incubate 37 degrees 1 hr.
- Run on 1% gel and cut out band, gel digest. Elute gel digest with water, nanodrop, and write the concentration on the Eppendorf tube.
- Phosphorylate sgRNA template oligos
- .5 uL of 100uM oligo (50 pmol)
- 2 uL 10x T4PNK buffer
- 2 uL 10 mM ATP (if not included in buffer, NEB)
- 1 uL T4 Polynucleotide Kinase
- 14.5 uL H20
- 20 uL total
- Incubate at 37 degrees of 20 minutes, then 75 degrees for 10 mins (for heat inactivation of T4PK) This protocol is saved on the beige PCR machine under Alexis/PHOSPHO
- Anneal oligos for sgRNA template
- 10 uL of each phosphorylation rxn for complimentary oligos
- .5 uL T4 ligase buffer
- 4.5 uL H2O
- 25 uL total
- Annealing reaction- in the PCR machine:
- 95 degrees for 5 mins
- Cycle: start at 95 degrees for 1 minute, each cycle decrease 1 degree for 70 cycles
- 4 degree hold
- This protocol is saved on the beige PCR machine under Alexis/ANNEAL
- Following this step, the estimated concentration should be ~ 9.24 ng/ul (calculated using Promega biomath pmol to ug calculator)
- Add 225 uL of water to each sample for total of 250 uL, and approx. concentration .924 ng/uL. Then use this concentration in calculations for the ligation step.
- Ligation
- NEBio Ligation Calculator is helpful
- set up 20 uL reactions using T4 DNA ligase and buffer
- 1:3 and 1:5 vector:insert ratios both worked well, using 70-100 ng of vector
- Recommended rxn:
- .94 uL digested pDCC6-1 vector (70 ng)
- 1.3 uL annealed oligos (1.335 ng) (5:1 ratio)
- 2 uL T4 ligase buffer
- 1 uL T4 ligase enzyme
- 15 uL H2O
- 20 uL total rxn volume
- PCR machine: 22 degrees 1 hr, 70 degrees 5 mins.
- Transformation
- 5 uL ligation reaction + 50 uL TOP 10 cells (From Zaher lab -80 freezer)
- Ice 30 mins, 42 degrees 30 sec, ice 5 mins, add 950 uL room temp SOC along with cells into culture tube, shake for 1 hr. Plate 30-150 uL. (all plasmids are amp resistant, plate with amp or carb)
- Miniprep and check sequence by sending plasmid out for sequencing using pDCC6 5’sequencing primer (144 base pairs upstream of BsbI sites): CGAACTGTGTTTTCAACAAACG This primer can be found in the Crispr Plasmids white freezer box in the -20 freezer.
- Make sure the sgRNA is sequence is correct. Make sure the TTTT following sgRNA sequence is intact (this is the stop sequence for Pol III).
- The sgRNA sequence is almost always correct. I recommend that you miniprep 2-3 colonies per plasmid, but send just 1 for sequencing initially. If there is a problem, then send the other 1 or 2 for sequencing.
- When you miniprep these plasmids, also make glycerol stocks, and keep the glycerol stocks for the confirmed correct plasmids in the -80 freezer, to use later or for midipreps.
- Assemble left and right sides for donor plasmid
- Assemble left and right sides
- For PCR reaction, use a high fidelity polymerase. Blunt ends are needed to insert into pJET vector (or you can do a blunting rxn). ideally PCR template should be genomic DNA from the strain you plan to inject into.
- Each rxn:
- 2.5 uL accuprime mix
- 1.5 uL 10 uM primer mix (4 uL of each primer 100 uM + 32 uL H2O)
- .5 uL DNA template (~200 ng/uL)
- .4 uL accuprime enzyme
- 19.5 uL H2O
- 25 uL total
- PCR reaction
- 95 degrees 2 mins
- 35 cycles:
- 95 degrees 15 sec
- 71 degrees 30 sec (for primer Tm’s 74-75, adjust accordingly)
- 68 degrees 1 min, 20 secs (for PCR products ~ 1 kb)
- 68 degrees 5 mins
- 4 degrees
- Troubleshooting suggestions for more difficult primer pairs: 200 ng template DNA, 1 uL accuprime enzyme, lower annealing temp (try a gradient PCR reaction), and/or .8 uL MgSO4 per rxn.
- Gel extract (if multiple bands) or PCR cleanup (if single, clean band)
- Each rxn:
- For Gblock/PCR product fusion, see end of this protocol.
- For PCR reaction, use a high fidelity polymerase. Blunt ends are needed to insert into pJET vector (or you can do a blunting rxn). ideally PCR template should be genomic DNA from the strain you plan to inject into.
- Assemble left and right sides
- Once left and right sides have been assembled, ligate into vector:We use cloneJET PCR cloning kit from life technologies (K1231). https://tools.thermofisher.com/content/sfs/manuals/MAN0012966_CloneJET_PCR_Cloning_40rxn_UG.pdf (I use half of suggested reagents for each rxn, works well)
- Set up ligation rxn on ice:
- 5 uL 2x rxn buffer (comes with pJET kit)
- X ng PCR insert (based on table below)
- 25 ng pJET1.2 cloning vector (.5 uL)
- 1 uL T4 DNA ligase
- X uL H2O
- Set up ligation rxn on ice:
10 uL total rxn volume
| Length of insertion (kb) | Quantity for ligation rxn (ng) |
| 1 | 25 |
| 2 | 50 |
| 3 | 75 |
| 4 | 100 |
- Incubate at room temp for 10 mins. (Or 30 mins for insertions > 3kb, to increase efficiency)
- Transform 5 ul, miniprep and check sequences.
- Test digest with BglII to see length of insert into pJet vector. Then send for sequencing using pJet F or R primer. Note that genomic sequences that were PCRd will often have small differences from reference genome.
- Engineer plasmid containing DSRed reporter in between homology arms
- Golden Gate reaction
- 50 ng backbone (pXZ13)
- 80 ng scarless-DsRed-pJet
- 80 ng left side
- 80 ng right side
- 1.5 uL 10x T4 Ligase Buffer
- 1 uL T4 Ligase Enzyme
- 1 uL BsmBI
- Water to 15 uL total volume
- (Note: thermoscientific T4 DNA ligase and buffer with NEB BsmBI enzyme works fine.)
- Protocol:
- 15 cycles: 37 degrees for 5 mins, 16 degrees for 10 mins
- 37 degrees for 15 mins
- 50 degrees for 5 mins
- 80 degrees for 5 mins
- 4 degree hold
- Transform 5 uL of golden gate reaction
- Miniprep from several colonies
- Test digest: If you’re eager to know right away whether the reaction worked, find 1-2 restriction enzymes to use, with ideally at least 1 site in each homology arm, which will cut the plasmid into a few bands that can be easily distinguished. Choose one of the minipreps that looks correct and send for sequencing. Sequence throughout the homology arms, attP sites and dsRed sequence.
- Sending for sequencing:
- Universal primers are in the pXZ13 backbone
- M13F(-41) to sequence left side
- T3 to sequence right side
- We have the following primers located in the dsRED sequence (CRISPR box in -20 freezer)
- 81(fwd) ccccgtaatgcagaagaaga
- Depending on the length of your sides, you may need to use additional primers.
- Universal primers are in the pXZ13 backbone
- Golden Gate reaction
- Prepare plasmids for injection
- Take the glycerol stocks for all of your plasmids that you will be injecting, and streak them onto LB + carb plates, let them grow overnight. The following day, pick single colonies to use for midipreps, grow in 50 mL + carb for about 16 hours. (It’s okay if you wait a few days between the plates and setting up the overnight, but if it’s more than a few days, streak on plates again.)
- The following day, midiprep using the Promega Pure Yield midi prep kit, following their protocol. Borrow vacuum manifold from Chalker or Duncan labs. Pour the overnight LB for each plasmid into a 50 mL falcon tube, and spin using the Zaher lab centrifuge (5th floor). For the final elution step, use the swinging bucket centrifuge in the Duncan lab.
- Once you have eluted your midiprep, nanodrop to get the concentration of each plasmid
- Get injection buffer from Paula, and purify each plasmid as per Paula’s protocol. I recommend that you start with 40 ug of each plasmid for the purification, and resuspend each plasmid in 10 uL of injection buffer. (This will give you much more DNA than necessary.)
- You will end up giving Paula 10 uL total volume, which must contain all of the necessary plasmids. I have been using the following concentrations:
- 500 ng/uL Donor plasmid (5 ug total)
- 100 ng/uL of each sgRNA plasmid (1 ug each)
- Add necessary additional injection buffer for 10 uL total volume
- Screening Flies
Injected flies should be collected as virgins and individually crossed to a balancer line for the appropriate chromosome. Collect the offspring of these crosses (F1), and screen for fluorescent red eyes. Those that are positive should be considered separate lines. Each positive F1 should be crossed to the balancer to generate a line, and homozygotes (if viable) for PCR screening.
PCR screen offspring to confirm insertion location of transgene. Design PCR reactions for each homology arm, spanning from inside the dsRed region to genomic region outside the homology arm. As a negative control, design a PCR reaction in the pXZ13 backbone to confirm that the backbone has not been inserted.
- Cross line to pBac transposase line to remove dsRed
We have the following line in lab:
8285 – w[1118]; CyO, P{Tub-PBac\T}2/wg[Sp-1]
GBlock Fusion Protocol: (can also be used for PCR products)
- Design gblocks and outer primers.
- Gblocks should be designed with 25-30 base pair overlap with ~ 50% GC content in overlap region.
- Include XbaI and HindIII sites, as well as 4-5 additional bases on each end.
- Gblock1 sequence: 4-5 base pairs – XBaI site – 1st half of insertion (ending with overlap)
- Gblock2 sequence: 2nd half of insertion (starting with overlap) – HindIII site – 4-5 base pairs
- Design primers that make up the outer 18-25 base pairs of the gblocks using typical primer parameters (if XBaI and HindIII sites aren’t included in gblocks, they can be added to the ends of the primers).

- Add water to gblocks to concentration of 25 ng/uL. Make a further dilution of a few uL to 2.5 ng/uL.
- Set up PCR reaction:
- 5 uL 10x accuprime buffer
- 1 uL DMSO
- 3.2 uL Gblock 1 (8 ng from 2.5 ng/uL)
- 3.2 uL Gblock 2 (8 ng from 2.5 ng/uL)
- 1 uL fwd primer (10 uM)
- 1 uL rev primer (10 uM)
- .4 uL accuprime enzyme
- 35.2 uL H20
- [50 uL total]
- Note: if 2 gblocks are not the same length, adjust proportions so that you are using equal molar ratios. (For example, if gblock1 is 3 times longer than gblock2 in base pairs, use 3x more of gblock 1 in terms of nanograms.)
- PCR rxn:
- 95C 10 mins
- 95C 30 sec
- Annealing temp 1 minute
- 72C 1:30 (or adjust extension time based on length of product) (repeat steps 2-4 x35)
- 72C 10 mins
- 4C
- PCR rxn:
- Run PCR reaction on gel and cut out band. If don’t get expected product, try additional annealing temperatures.
- DNA extraction from gel
Sequences:
Here, are the sequences for the common vectors used in this protocol. If you choose to use a program like ApE, I can send you files with further annotation.
pDCC6
GCGCCCAATACGCAAACCGCCTCTCCCCGCGCGTTGGCCGATTCATTAATGCAGGCAACTCGTGAAAGGTAGGCGGATCAGCGGTTCGACTTGCAGCCTGAAATACGGCACGAGTAGGAAAAGCCGAGTCAAATGCCGAATGCAGAGTCTCATTACAGCACAATCAACTCAAGAAAAACTCGACACTTTTTTACCATTTGCACTTAAATCCTTTTTTATTCGTTATGTATACTTTTTTTGGTCCCTAACCAAAACAAAACCAAACTCTCTTAGTCGTGCCTCTATATTTAAAACTATCAATTTATTATAGTCAATAAATCGAACTGTGTTTTCAACAAACGAACAATAGGACACTTTGATTCTAAAGGAAATTTTGAAAATCTTAAGCAGAGGGTTCTTAAGACCATTTGCCAATTCTTATAATTCTCAACTGCTCTTTCCTGATGTTGATCATTTATATAGGTATGTTTTCCTCAATACTTCggGTCTTCgaGAAGACctGTTTTAGAGCTAGAAATAGCAAGTTAAAATAAGGCTAGTCCGTTATCAACTTGAAAAAGTGGCACCGAGTCGGTGCTTTTTTGTTTTAGAGCTAGAAATAGCAAGTTAAAATAAGGCTAGTCCGTTTTTAGCGCGTGCGCCAATTCTGCAGACAAATGGCTCTAGAATCCCAAAACAAACTGGTTATTGTGGTAGGTCATTTGTTTGGCAGAAAGAAAACTCGAGAAATTTCTCTGGCCGTTATTCGTTATTCTCTCTTTTCTTTTTGGGTCTCTCCCTCTCTGCACTAATGCTCTCTCACTCTGTCACACAGTAAACGGCATACTGCTCTCGTTGGTTCGAGAGAGCGCGCCTCGAATGTTCGCGAAAAGAGCGCCGGAGTATAAATAGAGGCGCTTCGTCTACGGAGCGACAATTCAATTCAAACAAGCAAAGTGAACACGTCGCTAAGCGAAAGCTAAGCAAATAAACAAGCGCAGCTGAACAAGCTAAACAATCTGCAGCCAAGCTCGATAAGCTTGTTCGAATCTCGAGTGCGCGCTTCCGGAGGTATACACCTAGGCGGTACCACTGCAGTGAATTCGGAGCTCTACCGGTGCCACCATGGACTATAAGGACCACGACGGAGACTACAAGGATCATGATATTGATTACAAAGACGATGACGATAAGATGGCCCCAAAGAAGAAGCGGAAGGTCGGTATCCACGGAGTCCCAGCAGCCGACAAGAAGTACAGCATCGGCCTGGACATCGGCACCAACTCTGTGGGCTGGGCCGTGATCACCGACGAGTACAAGGTGCCCAGCAAGAAATTCAAGGTGCTGGGCAACACCGACCGGCACAGCATCAAGAAGAACCTGATCGGAGCCCTGCTGTTCGACAGCGGCGAAACAGCCGAGGCCACCCGGCTGAAGAGAACCGCCAGAAGAAGATACACCAGACGGAAGAACCGGATCTGCTATCTGCAAGAGATCTTCAGCAACGAGATGGCCAAGGTGGACGACAGCTTCTTCCACAGACTGGAAGAGTCCTTCCTGGTGGAAGAGGATAAGAAGCACGAGCGGCACCCCATCTTCGGCAACATCGTGGACGAGGTGGCCTACCACGAGAAGTACCCCACCATCTACCACCTGAGAAAGAAACTGGTGGACAGCACCGACAAGGCCGACCTGCGGCTGATCTATCTGGCCCTGGCCCACATGATCAAGTTCCGGGGCCACTTCCTGATCGAGGGCGACCTGAACCCCGACAACAGCGACGTGGACAAGCTGTTCATCCAGCTGGTGCAGACCTACAACCAGCTGTTCGAGGAAAACCCCATCAACGCCAGCGGCGTGGACGCCAAGGCCATCCTGTCTGCCAGACTGAGCAAGAGCAGACGGCTGGAAAATCTGATCGCCCAGCTGCCCGGCGAGAAGAAGAATGGCCTGTTCGGAAACCTGATTGCCCTGAGCCTGGGCCTGACCCCCAACTTCAAGAGCAACTTCGACCTGGCCGAGGATGCCAAACTGCAGCTGAGCAAGGACACCTACGACGACGACCTGGACAACCTGCTGGCCCAGATCGGCGACCAGTACGCCGACCTGTTTCTGGCCGCCAAGAACCTGTCCGACGCCATCCTGCTGAGCGACATCCTGAGAGTGAACACCGAGATCACCAAGGCCCCCCTGAGCGCCTCTATGATCAAGAGATACGACGAGCACCACCAGGACCTGACCCTGCTGAAAGCTCTCGTGCGGCAGCAGCTGCCTGAGAAGTACAAAGAGATTTTCTTCGACCAGAGCAAGAACGGCTACGCCGGCTACATTGACGGCGGAGCCAGCCAGGAAGAGTTCTACAAGTTCATCAAGCCCATCCTGGAAAAGATGGACGGCACCGAGGAACTGCTCGTGAAGCTGAACAGAGAGGACCTGCTGCGGAAGCAGCGGACCTTCGACAACGGCAGCATCCCCCACCAGATCCACCTGGGAGAGCTGCACGCCATTCTGCGGCGGCAGGAAGATTTTTACCCATTCCTGAAGGACAACCGGGAAAAGATCGAGAAGATCCTGACCTTCCGCATCCCCTACTACGTGGGCCCTCTGGCCAGGGGAAACAGCAGATTCGCCTGGATGACCAGAAAGAGCGAGGAAACCATCACCCCCTGGAACTTCGAGGAAGTGGTGGACAAGGGCGCTTCCGCCCAGAGCTTCATCGAGCGGATGACCAACTTCGATAAGAACCTGCCCAACGAGAAGGTGCTGCCCAAGCACAGCCTGCTGTACGAGTACTTCACCGTGTATAACGAGCTGACCAAAGTGAAATACGTGACCGAGGGAATGAGAAAGCCCGCCTTCCTGAGCGGCGAGCAGAAAAAGGCCATCGTGGACCTGCTGTTCAAGACCAACCGGAAAGTGACCGTGAAGCAGCTGAAAGAGGACTACTTCAAGAAAATCGAGTGCTTCGACTCCGTGGAAATCTCCGGCGTGGAAGATCGGTTCAACGCCTCCCTGGGCACATACCACGATCTGCTGAAAATTATCAAGGACAAGGACTTCCTGGACAATGAGGAAAACGAGGACATTCTGGAAGATATCGTGCTGACCCTGACACTGTTTGAGGACAGAGAGATGATCGAGGAACGGCTGAAAACCTATGCCCACCTGTTCGACGACAAAGTGATGAAGCAGCTGAAGCGGCGGAGATACACCGGCTGGGGCAGGCTGAGCCGGAAGCTGATCAACGGCATCCGGGACAAGCAGTCCGGCAAGACAATCCTGGATTTCCTGAAGTCCGACGGCTTCGCCAACAGAAACTTCATGCAGCTGATCCACGACGACAGCCTGACCTTTAAAGAGGACATCCAGAAAGCCCAGGTGTCCGGCCAGGGCGATAGCCTGCACGAGCACATTGCCAATCTGGCCGGCAGCCCCGCCATTAAGAAGGGCATCCTGCAGACAGTGAAGGTGGTGGACGAGCTCGTGAAAGTGATGGGCCGGCACAAGCCCGAGAACATCGTGATCGAAATGGCCAGAGAGAACCAGACCACCCAGAAGGGACAGAAGAACAGCCGCGAGAGAATGAAGCGGATCGAAGAGGGCATCAAAGAGCTGGGCAGCCAGATCCTGAAAGAACACCCCGTGGAAAACACCCAGCTGCAGAACGAGAAGCTGTACCTGTACTACCTGCAGAATGGGCGGGATATGTACGTGGACCAGGAACTGGACATCAACCGGCTGTCCGACTACGATGTGGACCATATCGTGCCTCAGAGCTTTCTGAAGGACGACTCCATCGACAACAAGGTGCTGACCAGAAGCGACAAGAACCGGGGCAAGAGCGACAACGTGCCCTCCGAAGAGGTCGTGAAGAAGATGAAGAACTACTGGCGGCAGCTGCTGAACGCCAAGCTGATTACCCAGAGAAAGTTCGACAATCTGACCAAGGCCGAGAGAGGCGGCCTGAGCGAACTGGATAAGGCCGGCTTCATCAAGAGACAGCTGGTGGAAACCCGGCAGATCACAAAGCACGTGGCACAGATCCTGGACTCCCGGATGAACACTAAGTACGACGAGAATGACAAGCTGATCCGGGAAGTGAAAGTGATCACCCTGAAGTCCAAGCTGGTGTCCGATTTCCGGAAGGATTTCCAGTTTTACAAAGTGCGCGAGATCAACAACTACCACCACGCCCACGACGCCTACCTGAACGCCGTCGTGGGAACCGCCCTGATCAAAAAGTACCCTAAGCTGGAAAGCGAGTTCGTGTACGGCGACTACAAGGTGTACGACGTGCGGAAGATGATCGCCAAGAGCGAGCAGGAAATCGGCAAGGCTACCGCCAAGTACTTCTTCTACAGCAACATCATGAACTTTTTCAAGACCGAGATTACCCTGGCCAACGGCGAGATCCGGAAGCGGCCTCTGATCGAGACAAACGGCGAAACCGGGGAGATCGTGTGGGATAAGGGCCGGGATTTTGCCACCGTGCGGAAAGTGCTGAGCATGCCCCAAGTGAATATCGTGAAAAAGACCGAGGTGCAGACAGGCGGCTTCAGCAAAGAGTCTATCCTGCCCAAGAGGAACAGCGATAAGCTGATCGCCAGAAAGAAGGACTGGGACCCTAAGAAGTACGGCGGCTTCGACAGCCCCACCGTGGCCTATTCTGTGCTGGTGGTGGCCAAAGTGGAAAAGGGCAAGTCCAAGAAACTGAAGAGTGTGAAAGAGCTGCTGGGGATCACCATCATGGAAAGAAGCAGCTTCGAGAAGAATCCCATCGACTTTCTGGAAGCCAAGGGCTACAAAGAAGTGAAAAAGGACCTGATCATCAAGCTGCCTAAGTACTCCCTGTTCGAGCTGGAAAACGGCCGGAAGAGAATGCTGGCCTCTGCCGGCGAACTGCAGAAGGGAAACGAACTGGCCCTGCCCTCCAAATATGTGAACTTCCTGTACCTGGCCAGCCACTATGAGAAGCTGAAGGGCTCCCCCGAGGATAATGAGCAGAAACAGCTGTTTGTGGAACAGCACAAGCACTACCTGGACGAGATCATCGAGCAGATCAGCGAGTTCTCCAAGAGAGTGATCCTGGCCGACGCTAATCTGGACAAAGTGCTGTCCGCCTACAACAAGCACCGGGATAAGCCCATCAGAGAGCAGGCCaAGAATATCATCCACCTGTTTACCCTGACCAATCTGGGAGCCCCTGCCGCCTTCAAGTACTTTGACACCACCATCGACCGGAAGAGGTACACCAGCACCAAAGAGGTGCTGGACGCCACCCTGATCCACCAGAGCATCACCGGCCTGTACGAGACACGGATCGACCTGTCTCAGCTGGGAGGCGACAGCCCCAAGAAGAAGAGAAAGGTGGAGGCCAGCTAATAGGACCCAGCTTTCTTGTACAAAGTGGTGACGTAAGCTAGCAGGATCTTTGTGAAGGAACCTTACTTCTGTGGTGTGACATAATTGGACAAACTACCTACAGAGATTTAAAGCTCTAAGGTAAATATAAAATTTTTAAGTGTATAATGTGTTAAACTACTGATTCTAATTGTTTGTGTATTTTAGATTCCAACCTATGGAACTGATGAATGGGAGCAGTGGTGGAATGCCTTTAATGAGGAAAACCTGTTTTGCTCAGAAGAAATGCCATCTAGTGATGATGAGGCTACTGCTGACTCTCAACATTCTACTCCTCCAAAAAAGAAGAGAAAGGTAGttGACCCCAAGGACTTTCCTTCAGAATTGCTAAGTTTTTTGAGTCATGCTGTGTTTAGTAATAGAACTCTTGCTTGCTTTGCTATTTACACCACAAAGGAAAAAGCTGCACTGCTATACAAGAAAATTATGGAAAAATATTCTGTAACCTTTATAAGTAGGCATAACAGTTATAATCATAACATACTGTTTTTTCTTACTCCACACAGGCATAGAGTGTCTGCTATTAATAACTATGCTCAAAAATTGTGTACCTTTAGCTTTTTAATTTGTAAAGGGGTTAATAAGGAATATTTGATGTATAGTGCCTTGACTAGAGATCATAATCAGCCATACCACATTTGTAGAGGTTTTACTTGCTTTAAAAAACCTCCCACACCTCCCCCTGAACCTGAAACATAAAATGAATGCAATTGTTGTTGTTAACTTGTTTATTGCAGCTTATAATGGTTACAAATAAAGCAATAGCATCACAAATTTCACAAATAAAGCATTTTTTTCACTGCATTCTAGTTGTGGTTTGTCCAAACTCATCAATGTATCTTATCATGTCTGGATCCCGTTTAAACTACGCGTAATTCAAACAGGGTTCTGGCGTCGTTCTCGTACTGTTTTCCCCAGGCCAGTGCTTTAGCGTTATTGAAAAAGGAAGAGTATGAGTATTCAACATTTCCGTGTCGCCCTTATTCCCTTTTTTGCGGCATTTTGCCTTCCTGTTTTTGCTCACCCAGAAACGCTGGTGAAAGTAAAAGATGCTGAAGATCAGTTGGGTGCACGAGTGGGTTACATCGAACTGGATCTCAACAGCGGTAAGATCCTTGAGAGTTTTCGCCCCGAAGAACGTTTTCCAATGATGAGCACTTTTAAAGTTCTGCTATGTGGCGCGGTATTATCCCGTATTGACGCCGGGCAAGAGCAACTCGGTCGCCGCATACACTATTCTCAGAATGACTTGGTTGAGTACTCACCAGTCACAGAAAAGCATCTTACGGATGGCATGACAGTAAGAGAATTATGCAGTGCTGCCATAACCATGAGTGATAACACTGCGGCCAACTTACTTCTGACAACGATCGGAGGACCGAAGGAGCTAACCGCTTTTTTGCACAACATGGGGGATCATGTAACTCGCCTTGATCGTTGGGAACCGGAGCTGAATGAAGCCATACCAAACGACGAGCGTGACACCACGATGCCTGTAGCAATGGCAACAACGTTGCGCAAACTATTAACTGGCGAACTACTTACTCTAGCTTCCCGGCAACAATTAATAGACTGGATGGAGGCGGATAAAGTTGCAGGACCACTTCTGCGCTCGGCCCTTCCGGCTGGCTGGTTTATTGCTGATAAATCTGGAGCCGGTGAGCGTGGGTCTCGCGGTATCATTGCAGCACTGGGGCCAGATGGTAAGCCCTCCCGTATCGTAGTTATCTACACGACGGGGAGTCAGGCAACTATGGATGAACGAAATAGACAGATCGCTGAGATAGGTGCCTCACTGATTAAGCATTGGTAACTGTCAGACCAAGTTTACTCATATATACTTTAGATTGATTTAAAACTTCATTTTTAATTTAAAAGGATCTAGGTGAAGATCCTTTTTGATAATCTCATGACCAAAATCCCTTAACGTGAGTTTTCGTTCCACTGAGCGTCAGACCCCGTAGAAAAGATCAAAGGATCTTCTTGAGATCCTTTTTTTCTGCGCGTAATCTGCTGCTTGCAAACAAAAAAACCACCGCTACCAGCGGTGGTTTGTTTGCCGGATCAAGAGCTACCAACTCTTTTTCCGAAGGTAACTGGCTTCAGCAGAGCGCAGATACCAAATACTGTTCTTCTAGTGTAGCCGTAGTTAGGCCACCACTTCAAGAACTCTGTAGCACCGCCTACATACCTCGCTCTGCTAATCCTGTTACCAGTGGCTGCTGCCAGTGGCGATAAGTCGTGTCTTACCGGGTTGGACTCAAGACGATAGTTACCGGATAAGGCGCAGCGGTCGGGCTGAACGGGGGGTTCGTGCACACAGCCCAGCTTGGAGCGAACGACCTACACCGAACTGAGATACCTACAGCGTGAGCTATGAGAAAGCGCCACGCTTCCCGAAGGGAGAAAGGCGGACAGGTATCCGGTAAGCGGCAGGGTCGGAACAGGAGAGCGCACGAGGGAGCTTCCAGGGGGAAACGCCTGGTATCTTTATAGTCCTGTCGGGTTTCGCCACCTCTGACTTGAGCGTCGATTTTTGTGATGCTCGTCAGGGGGGCGGAGCCTATGGAAAAACGCCAGCAACGCGGCCTTTTTACGGTTCCTGGCCTTTTGCTGGCCTTTTGCTCACATGTTCTTTCCTGCGTTATCCCCTGATTCTGTGGATAACCGTATTACCGCCTTTGAGTGAGCTGATACCGCTCGCCGCAGCCGAACGACCGAGCGCAGCGAGTCAGTGAGCGAGGAAGCGGAAGA
pXZ13
ctgacgcgccctgtagcggcgcattaagcgcggcgggtgtggtggttacgcgcagcgtgaccgctacacttgccagcgccctagcgcccgctcctttcgctttcttcccttcctttctcgccacgttcgccggctttccccgtcaagctctaaatcgggggctccctttagggttccgatttagtgctttacggcacctcgaccccaaaaaacttgattagggtgatggttcacgtagtgggccatcgccctgatagacggtttttcgccctttgacgttggagtccacgttctttaatagtggactcttgttccaaactggaacaacactcaaccctatctcggtctattcttttgatttataagggattttgccgatttcggcctattggttaaaaaatgagctgatttaacaaaaatttaacgcgaattttaacaaaatattaacgcttacaatttccattcgccattcaggctgcgcaactgttgggaagggcgatcggtgcgggcctcttcgctattacgccagctggcgaaagggggatgtgctgcaaggcgattaagttgggtaacgccagggttttcccagtcacgacgttgtaaaacgacggccagtgagcgcgcgtaatacgactcactatagggcgaattggGTACGGACTGAGACGTGGTGTGCACACCACGTCTCAATGCAGGTGGAGCTccagcttttgttccctttagtgagggttaattgcgcgcttggcgtaatcatggtcatagctgtttcctgtgtgaaattgttatccgctcacaattccacacaacatacgagccggaagcataaagtgtaaagcctggggtgcctaatgagtgagctaactcacattaattgcgttgcgctcactgcccgctttccagtcgggaaacctgtcgtgccagctgcattaatgaatcggccaacgcgcggggagaggcggtttgcgtattgggcgctcttccgcttcctcgctcactgactcgctgcgctcggtcgttcggctgcggcgagcggtatcagctcactcaaaggcggtaatacggttatccacagaatcaggggataacgcaggaaagaacatgtgagcaaaaggccagcaaaaggccaggaaccgtaaaaaggccgcgttgctggcgtttttccataggctccgcccccctgacgagcatcacaaaaatcgacgctcaagtcagaggtggcgaaacccgacaggactataaagataccaggcgtttccccctggaagctccctcgtgcgctctcctgttccgaccctgccgcttaccggatacctgtccgcctttctcccttcgggaagcgtggcgctttctcatagctcacgctgtaggtatctcagttcggtgtaggtcgttcgctccaagctgggctgtgtgcacgaaccccccgttcagcccgaccgctgcgccttatccggtaactatcgtcttgagtccaacccggtaagacacgacttatcgccactggcagcagccactggtaacaggattagcagagcgaggtatgtaggcggtgctacagagttcttgaagtggtggcctaactacggctacactagaaggacagtatttggtatctgcgctctgctgaagccagttaccttcggaaaaagagttggtagctcttgatccggcaaacaaaccaccgctggtagcggtggtttttttgtttgcaagcagcagattacgcgcagaaaaaaaggatctcaagaagatcctttgatcttttctacggggtctgacgctcagtggaacgaaaactcacgttaagggattttggtcatgagattatcaaaaaggatcttcacctagatccttttaaattaaaaatgaagttttaaatcaatctaaagtatatatgagtaaacttggtctgacagttaccaatgcttaatcagtgaggcacctatctcagcgatctgtctatttcgttcatccatagttgcctgactccccgtcgtgtagataactacgatacgggagggcttaccatctggccccagtgctgcaatgataccgcgagacccacgctcaccggctccagatttatcagcaataaaccagccagccggaagggccgagcgcagaagtggtcctgcaactttatccgcctccatccagtctattaattgttgccgggaagctagagtaagtagttcgccagttaatagtttgcgcaacgttgttgccattgctacaggcatcgtggtgtcacgctcgtcgtttggtatggcttcattcagctccggttcccaacgatcaaggcgagttacatgatcccccatgttgtgcaaaaaagcggttagctccttcggtcctccgatcgttgtcagaagtaagttggccgcagtgttatcactcatggttatggcagcactgcataattctcttactgtcatgccatccgtaagatgcttttctgtgactggtgagtactcaaccaagtcattctgagaatagtgtatgcggcgaccgagttgctcttgcccggcgtcaatacgggataataccgcgccacatagcagaactttaaaagtgctcatcattggaaaacgttcttcggggcgaaaactctcaaggatcttaccgctgttgagatccagttcgatgtaacccactcgtgcacccaactgatcttcagcatcttttactttcaccagcgtttctgggtgagcaaaaacaggaaggcaaaatgccgcaaaaaagggaataagggcgacacggaaatgttgaatactcatactcttcctttttcaatattattgaagcatttatcagggttattgtctcatgagcggatacatatttgaatgtatttagaaaaataaacaaataggggttccgcgcacatttccccgaaaagtgccac
Scarless-DsRed-pJet
GCCCCTGCAGCCGAATTATATTATTTTTGCCAAATAATTTTTAACAAAAGCTCTGAAGTCTTCTTCATTTAAATTCTTAGATGATACTTCATCTGGAAAATTGTCCCAATTAGTAGCATCACGCTGTGAGTAAGTTCTAAACCATTTTTTTATTGTTGTATTATCTCTAATCTTACTACTCGATGAGTTTTCGGTATTATCTCTATTTTTAACTTGGAGCAGGTTCCATTCATTGTTTTTTTCATCATAGTGAATAAAATCAACTGCTTTAACACTTGTGCCTGAACACCATATCCATCCGGCGTAATACGACTCACTATAGGGAGAGCGGCCGCCAGATCTTCCGGATGGCTCGAGTTTTTCAGCAAGATcacaccacgtctcattaaCCCTAGAAAGATAATCATATTGTGCCCTAGAAAGATAATCATATTGTGACGTACGTTAAAGATAATCATGCGTAAAATTGACGCATGTGTTTTATCGGTCTGTATATCGAGGTTTATTTATTAATTTGAATAGATATTAAGTTTTATTATATTTACACTTACATACTAATAATAAATTCAACAAACAATTTATTTATGTTTATTTATTTATTAAAAAAAAACAAAAACTCAAAATTTCTTCTATAAAGTAACAAAACTTTTAGGATCTAATTCAATTAGAGACTAATTCAATTAGAGCTAATTCAATTAGGATCCAAGCTTATCGATTTCGAACCCTCGACCGCCGGAGTATAAATAGAGGCGCTTCGTCTACGGAGCGACAATTCAATTCAAACAAGCAAAGTGAACACGTCGCTAAGCGAAAGCTAAGCAAATAAACAAGCGCAGCTGAACAAGCTAAACAATCGGCTCGAAGCCGGTCGCCACCatgGCCTCCTCCGAGGACGTCATCAAGGAGTTCATGCGCTTCAAGGTGCGCATGGAGGGCTCCGTGAACGGCCACGAGTTCGAGATCGAGGGCGAGGGCGAGGGCCGCCCCTACGAGGGCACCCAGACCGCCAAGCTGAAGGTGACCAAGGGCGGCCCCCTGCCCTTCGCCTGGGACATCCTGTCCCCCCAGTTCCAGTACGGCTCCAAGGTGTACGTGAAGCACCCCGCCGACATCCCCGACTACAAGAAGCTGTCCTTCCCCGAGGGCTTCAAGTGGGAGCGCGTGATGAACTTCGAGGACGGCGGCGTGGTGACCGTGACCCAGGACTCCTCCCTcCAGGACGGCTCCTTCATCTACAAGGTGAAGTTCATCGGCGTGAACTTCCCCTCCGACGGCCCCGTAATGCAGAAGAAGACTATGGGCTGGGAGGCgTCCACCGAGCGCCTGTACCCCCGCGACGGCGTGCTGAAGGGCGAGATCCACAAGGCCCTGAAGCTGAAGGACGGCGGCCACTACCTGGTGGAGTTCAAGTCCATCTACATGGCCAAGAAGCCCGTGCAGCTGCCCGGCTACTACTACGTGGACTCCAAGCTGGACATCACCTCCCACAACGAGGACTACACCATCGTGGAGCAGTACGAGCGCGCCGAGGGCCGCCACCACCTGTTCCTGTAGCGGCCGCGACTCTAGATCATAATCAGCCATACCACATTTGTAGAGGTTTTACTTGCTTTAAAAAACCTCCCACACCTCCCCCTGAACCTGAAACATAAAATGAATGCAATTGTTGTTGTTAACTTGTTTATTGCAGCTTATAATGGTTACAAATAAAGCAATAGCATCACAAATTTCACAAATAAAGCATTTTTTTCACTGCATTCTAGTTGTGGTTTGTCCAAACTCATCAATGTATCTTAGATATCTATAACAAGAAAATATATATATAATAAGTTATCACGTAAGTAGAACATGAAATAACAATATAATTATCGTATGAGTTAAATCTTAAAAGTCACGTAAAAGATAATCATGCGTCATTTTGACTCACGCGGTCGTTATAGTTCAAAATCAGTGACACTTACCGCATTGACAAGCACGCCTCACGGGAGCTCCAAGCGGCGACTGAGATGTCCTAAATGCACAGCGACGGATTCGCGCTATTTAGAAAGAGAGAGCAATATTTCAAGAATGCATGCGTCAATTTTACGCAGACTATCTTTCTAGGGtgagacgtggtgtgATCTTTCTAGAAGATCTCCTACAATATTCTCAGCTGCCATGGAAAATCGATGTTCTTCTTTTATTCTCTCAAGATTTTCAGGCTGTATATTAAAACTTATATTAAGAACTATGCTAACCACCTCATCAGGAACCGTTGTAGGTGGCGTGGGTTTTCTTGGCAATCGACTCTCATGAAAACTACGAGCTAAATATTCAATATGTTCCTCTTGACCAACTTTATTCTGCATTTTTTTTGAACGAGGTTTAGAGCAAGCTTCAGGAAACTGAGACAGGAATTTTATTAAAAATTTAAATTTTGAAGAAAGTTCAGGGTTAATAGCATCCATTTTTTGCTTTGCAAGTTCCTCAGCATTCTTAACAAAAGACGTCTCTTTTGACATGTTTAAAGTTTAAACCTCCTGTGTGAAATTATTATCCGCTCATAATTCCACACATTATACGAGCCGGAAGCATAAAGTGTAAAGCCTGGGGTGCCTAATGAGTGAGCTAACTCACATTAATTGCGTTGCGCTCACTGCCAATTGCTTTCCAGTCGGGAAACCTGTCGTGCCAGCTGCATTAATGAATCGGCCAACGCGCGGGGAGAGGCGGTTTGCGTATTGGGCGCTCTTCCGCTTCCTCGCTCACTGACTCGCTGCGCTCGGTCGTTCGGCTGCGGCGAGCGGTATCAGCTCACTCAAAGGCGGTAATACGGTTATCCACAGAATCAGGGGATAACGCAGGAAAGAACATGTGAGCAAAAGGCCAGCAAAAGGCCAGGAACCGTAAAAAGGCCGCGTTGCTGGCGTTTTTCCATAGGCTCCGCCCCCCTGACGAGCATCACAAAAATCGACGCTCAAGTCAGAGGTGGCGAAACCCGACAGGACTATAAAGATACCAGGCGTTTCCCCCTGGAAGCTCCCTCGTGCGCTCTCCTGTTCCGACCCTGCCGCTTACCGGATACCTGTCCGCCTTTCTCCCTTCGGGAAGCGTGGCGCTTTCTCATAGCTCACGCTGTAGGTATCTCAGTTCGGTGTAGGTCGTTCGCTCCAAGCTGGGCTGTGTGCACGAACCCCCCGTTCAGCCCGACCGCTGCGCCTTATCCGGTAACTATCGTCTTGAGTCCAACCCGGTAAGACACGACTTATCGCCACTGGCAGCAGCCACTGGTAACAGGATTAGCAGAGCGAGGTATGTAGGCGGTGCTACAGAGTTCTTGAAGTGGTGGCCTAACTACGGCTACACTAGAAGGACAGTATTTGGTATCTGCGCTCTGCTGAAGCCAGTTACCTTCGGAAAAAGAGTTGGTAGCTCTTGATCCGGCAAACAAACCACCGCTGGTAGCGGTGGTTTTTTTGTTTGCAAGCAGCAGATTACGCGCAGAAAAAAAGGATCTCAAGAAGATCCTTTGATCTTTTCTACGGGGTCTGACGCTCAGTGGAACGAAAACTCACGTTAAGGGATTTTGGTCATGAGATTATCAAAAAGGATCTTCACCTAGATCCTTTTAAATTAAAAATGAAGTTTTAAATCAATCTAAAGTATATATGAGTAAACTTGGTCTGACAGTTACCAATGCTTAATCAGTGAGGCACCTATCTCAGCGATCTGTCTATTTCGTTCATCCATAGTTGCCTGACTCCCCGTCGTGTAGATAACTACGATACGGGAGGGCTTACCATCTGGCCCCAGTGCTGCAATGATACCGCGAGACCCACGCTCACCGGCTCCAGATTTATCAGCAATAAACCAGCCAGCCGGAAGGGCCGAGCGCAGAAGTGGTCCTGCAACTTTATCCGCCTCCATCCAGTCTATTAATTGTTGCCGGGAAGCTAGAGTAAGTAGTTCGCCAGTTAATAGTTTGCGCAACGTTGTTGCCATTGCTACAGGCATCGTGGTGTCACGCTCGTCGTTTGGTATGGCTTCATTCAGCTCCGGTTCCCAACGATCAAGGCGAGTTACATGATCCCCCATGTTGTGCAAAAAAGCGGTTAGCTCCTTCGGTCCTCCGATCGTTGTCAGAAGTAAGTTGGCCGCAGTGTTATCACTCATGGTTATGGCAGCACTGCATAATTCTCTTACTGTCATGCCATCCGTAAGATGCTTTTCTGTGACTGGTGAGTACTCAACCAAGTCATTCTGAGAATAGTGTATGCGGCGACCGAGTTGCTCTTGCCCGGCGTCAATACGGGATAATACCGCGCCACATAGCAGAACTTTAAAAGTGCTCATCATTGGAAAACGTTCTTCGGGGCGAAAACTCTCAAGGATCTTACCGCTGTTGAGATCCAGTTCGATGTAACCCACTCGTGCACCCAACTGATCTTCAGCATCTTTTACTTTCACCAGCGTTTCTGGGTGAGCAAAAACAGGAAGGCAAAATGCCGCAAAAAAGGGAATAAGGGCGACACGGAAATGTTGAATACTCATACTCTTCCTTTTTCAATATTATTGAAGCATTTATCAGGGTTATTGTCTCATGAGCGGATACATATTTGAATGTATTTAGAAAAATAAACAAATAGGGGTTCCGCGCACATTTCCCCGAAAAGTGCCACCTGACGTCTAAGAAACCATTATTATCATGACATTAACCTATAAAAATAGGCGTATCACGAGGCC
Duncan Lab Locust embryo injection protocol:
The following protocol was developed in the Duncan lab. Existing insect injection protocols were all found to be inadequate due the much greater size of the Locust embryo compared to Drosophila, Bombus or Anopheles embryos. The protocol makes use of standard 100 mm square petri dishes and 1% low melt agarose. The embryos are simply washed in warm water, and then embedded along the sides of the dish with low melt. The plastic edge of the dish provides the necessary stability to keep the large embryos from moving during the injection process, and then the embryos can be easily removed from the agar with small artist brushes for development in the same dish.
- Set up moistened sand boxes (moisten with warm tap water until the sand just sticks together, DON’T have standing water on the surface of the box. Fill the box just to the top for 3 to 4 inches deep of sand) at 5 to 8 PM the night before injections.
- Remove the boxes the next morning as soon as a pod is observed to be laid.
- Run sand with egg pods through stacked sieves* in a sink with warm tap water, use tubing attached to faucet to wash sand through sieves.
- Collect yellow egg pods for injection (eggs will separate from each other under the running water if they are freshly laid).
- Wash as much sand as possible off of eggs in sieve, place eggs on wet filter paper in square petri dish
- Add 100 µl of 37o C agarose** along one side of bottom half of petri. Using the dissecting scope, quickly line up 7 to 8 embryos along edge in agarose with posterior end facing left.
- Repeat process for all four sides of petri dish. Mark one edge of petri with sharpie; put on lid and set on slide warmer set at 30 to 32 C.
- Repeat for remaining petris (I usually do 3 petris a day for a total of 60 to 90 embryos).
- Set micromanipulator *** for locust injections:
- X = 5.0
- Z = 4.0
- Needle holder = 6.0
- Turn on Injectman and Femtojet (make sure that the tubing on the Femtojet is NOT plugged in until after you turn it on and it purges). Connect tubing to Femtojet by locking it a quarter turn to the right. Set to program 2****.
- Fill an injection needle with DNA solution in dye (3 to 4 µl works well) using a needle-filling pipet tip. Tap needle to bring solution down to tip if necessary.
- Slide needle into Injectman holder until it stops; tighten needle holder.
- Squirt enough warm water onto first embryo petri to cover all four sides.
- Place petri on inverted microscope stage, get embryos into focus (5X objective, gooseneck light on as well as transmitted light).
- Set needle at 15o angle and slowly move it down and to the left until you can get it into focus near the embryos. (Focus embryos with the microscope focus controls, focus the needle with the Injectman joystick controls).
Break the needle tip to open it: slowly move the needle to the left until it makes contact with the left side of the petri dish (you should see the needle flex slightly when it makes contact). Bring needle back to the right and press the joystick button; if the flow looks good proceed with injecting the embryos.
- Embryos should each receive 3 to 4 pulses of the button. The injection site should be at the embryo posterior micropyle (apparent as a circumferential indentation close to the posterior end of the embryo)

- To turn plate to new edge, press the HOME button on the Injectman, quickly turn the plate, and press the HOME button a second time (be careful to have the petri far enough to the left that the needle doesn’t hit the left wall when it comes back down).

After all embryos are injected on a plate, press HOME, remove the plate and pour off the water. Place a moist filter paper in the plate, cover it and put it on the slide warmer.
- You can try to use the needle over for the next plate, but if it’s clogged (not much fluid coming out when you press the button) you can just load a new needle and repeat from step 12. Also, if the needle becomes clogged while doing a plate, first try hitting the CLEAN button a few times to unclog it.
- After all petris are done, remove the embryos from the agar to the moist filter paper in the center, and mark the plates:
- DATE
- DNA injected
- color of embryos at time of injection (yellow or yellow/brown)
- any other comments (needle was poor, etc)
- place petris in plastic sandwich boxes and incubate at 30oC until hatching (approximately 18 to 20 days)
*Order of sieves: number 18 on top, number 35 in middle, number 140 on bottom.
**Agarose is 1% Low Melt in water, kept at 37oC to stay molten.
***food grade dye, add 1 µl to 5µl DNA. Be sure to test with dye lot in buffer only, compare hatch rates to uninjected siblings. There should not be a significant difference.
Reagents:
1. Sieves:USA Standard Test Sieve – Fisher Scientific number 18 (1 mm), 35 (0.5 mm) and 140 (106 microns)
2. Sand: Pavestone natural play sand, filtered through number 20 (0.85 mm) sieve
3. Low melt agarose: Invitrogen L.M.P. agarose, cat number 15517-014
4. Petri dishes: VWR 100X100 mm square, cat number 10799-104
5. Injection apparatus: Eppendorf Femtojet model 4i (gas-free pulser) Eppendorf Injectman model 4 (motorized micromanipulator)
6. Needles: Sutter instruments BF100-58-10 (thick walled with inner filament)
7. Needle puller: Sutter instruments model P-97
Parameters for puller: Trough filament:
Heat = ramp + 18oC) Pull = 500 ) Velocity = 70 ) Loop Pull = 70 ) Time = 250 )
NOTE: needle pullers vary CONSIDERABLY and parameters change EACH TIME you change the filament. The type of capillary and the final shape of the needle are the most important values. Using our puller, we get this shape of needle

Grasshopper Husbandry 101
Overview
Pronouns used (us, we, our) are in reference to the labs of I. Duncan and Y. Ben Shahar (Washington University, St. Louis).
Guidance has been received from members of the Washington University Biology Animal Facility (D. Piatchek, P. Olson), Dr. Baranidharan Raman (Washington University), and B. Zapusek (Arizona State University).
A list of the supplies we use is included. Our general aim was to find items as easily and as generally affordable as possible.
References to written guidance:
Badman, J, Harrison, J.F., and McGarry, M.P. Grasshoppers in research and education: methods for maintenance and production. Lab Animal 36(3), 27-31 (2007).
Squitier, J.M. and Capinera, J.L. American Grasshopper, Schistocerca americana (Drury)(Insecta: Orthoptera:acrididae). This document is EENY-004 from a series of the Entomology and Nematology Department, UF/IFAS Extension (1996 and 2014).
Getting Started
Space

The first need to be met is space. Grasshopper cages are not small and therefore require a fair amount of space. We were fortunate to have available a room (to be called the husbandry room in this text) measuring 66 inches deep by 95 inches wide with adjustable shelving and multiple electrical outlets. Critically important to the space was that its temperature could be raised to the heat needed without triggering any fire safety devices. Also, we worked with our Facilities department to suppress air conditioning to our room.
The room described above is within another room (to be called the feeding room in this text). The feeding room has sit-down bench space, a sink, the grass growth racks, and general storage space.

We tried unsuccessfully to raise grasshoppers within an incubator. The problems encountered were perhaps cage-related and might be negated with the current cages we’re using. However, an incubator generally has limited amount of space. Grasshoppers need to jump which thus requires a large cage. Unless the incubator is huge and the population being reared is small, our recommendation is to use a room or sizable growth chamber.
Temperature
Grasshoppers are best reared at or near 100 degrees F/37.8 degrees C. A few degrees lower doesn’t seem to matter much, but we’ve found that the colony’s growth (egg hatching intervals, frequency and quantity of egg pod lays, nymph progress) is notably slower at temperatures below 90 degrees F/32.2 degrees C.
We use two electric convection heaters for our husbandry room. They are timed to start heating to 100 degrees at 6 AM and timed to shut off at 6 PM to coincide with evening cooling. The overnight temperature is in the vicinity of 75 degrees F.

Convection Heater 
LED Light source
Light/Dark Cycle
To mimic outdoor lighting, we set up lighting on the walls of our husbandry room and timed it for 12 hours on, 12 hours off. *Because our plant growth rack lamps operate continuously and the rack stands close to the clear glass wall of the husbandry room, our grasshoppers never have complete darkness. They don’t seem to be affected.
Humidity
Our research involves the collection of grasshopper embryos for micro-injection purposes. To keep embryo pods from desiccating, we first introduced a small humidifier from home with marginal results, and later brought in a larger console-style unit which dramatically improved the husbandry room’s humidity levels. Not only did this help with our embryo pods, the grasshoppers seemed to need to eat less grass to stay hydrated.
We set our console at 50% humidity and the lowest option for the fan (F1 on our console). The water canisters are checked and filled daily. The filters are checked/replaced as indicated by the console.
Food

mating pair eating 
single locust eating kale
Grasshoppers love to eat. A lot. Grasshoppers need to be fed. Daily. That includes weekends, vacations, and holidays! This should be a significant consideration prior to starting work with them.
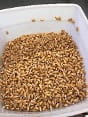
The bulk of our grasshoppers’ diet consists of wheat grass. The quantity of grass offered should be enough such that the next day there are still remnants of it remaining.
We also daily offer the older nymphs (stage 4+) and the adults 6g of wheat germ, and a handful (50g or more) of kale or approximately 10g chopped edamame. Our hope is that the protein-rich kale or edamame would enhance the health of the embryos. *The numbers here are geared to our crowded (100+ grasshoppers) cages.
We strive to purchase organic products only. However, when that’s not an option, we’ll first test the non-organic material on a single cage to be sure it’s not hazardous.
We aim to feed our cages at roughly the same time each day. The hoppers will be just fine if they must wait a couple extra hours, though.
Grass Growth

Planning for grass growth must take place at the same time planning for husbandry space occurs. One cannot find ample quantities of wheat grass at the grocery store-we tried! Our racks for grass growth are in the feeding room. One rack (four shelves) is outfitted with standard growth lamps, and the other rack is unlit. The rack(s) need not be in the feeding room, but it’s quite convenient that they are. Wherever the grass is grown, it’s essential to have an easy watering device handy: a hose connected to the water source is much better than refilling a watering can multiple times.
How much grass? How often to plant seeds? This will depend on the number of grasshoppers being fed. One of our trays of grass yields eight (8) pads. A cage of roughly 100 adults will eat four (4) pads daily. Nymphs in stages 4+ will eat even more. A tray of grass generally takes a week to get to the usable stage. Plan to make more than needed.
How To’s
Grass Growth
Prepare the wheat seeds as directed by the supplier. Generally, soak the seeds overnight in ample water. Drain and rinse the following morning. Rinse again later in the day. Plant the following day; planting later yields unsuccessful growth. For our trays, we allot 150 g of seed per tray.
Scoop enough soil into the tray to measure about 0.5 inch depth. Add enough water such that there is no puddling-about 800ml works for our trays. Massage the water into the soil to moisten completely. Scatter seeds evenly and generously, paying attention that the sides and corners have seed coverage. Tamp down gently. Do not bury the seeds. Drizzle a small volume (around 300ml) of water carefully over the seeds—don’t soak such that water is visible. Cover the tray. Incubate under growth lamps at room temperature (25 degrees C). Expect that the grass will be usable in 7+ days. Water daily or as needed to keep moderately moist, not soaked. Seed growth can be started on the bench using under-counter fluorescent lights if space is limited on the growth rack.
wheatgrass seeds 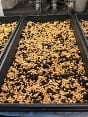


Blue-green mold often starts forming on the soil surface as the tray ages. This mold hasn’t seemed to be a problem for the grasshoppers, however too much mold may lead to a mite infestation. Our blue-green mold seems to be a seasonal occurrence in the spring-summer.
Feeding
Assemble needed foodstuffs. Cut grass pads into the desired size and lightly water, if needed. Open cage, remove consumed grass pads, and sweep out frass (using a hand, a paintbrush). Add fresh food.
First instar nymphs are exceptionally spastic and unpredictable. They’re also nearly impossible to feel on one’s hand. Extra care needs to be taken so that they don’t get out. We leave these cages largely uncleaned of frass until the hoppers are about 1-2 weeks of age. At that point they’ve started avoiding our hands and are climbing up the walls vs. flinging themselves randomly, plus they’re also larger/heavier to feel clinging to our hands. To remove the spent grass pads, we shake them vigorously for several seconds to dislodge the nymphs and then quickly pull the grass pad out. Invariably there’ll be one or several hangers-on that pop off onto the floor. Have a disposable cup and lid handy in which to capture them. Check for online guidance on making an insect pooter which is also useful for capturing escapees.
Adults will lay their egg pods wherever: on the floor of the cage, through the grass pads, or in a box of sand if it’s provided. When we see adults pairing, we routinely place their grass pads into plastic sandwich boxes within the cage. This keeps egg pods laid through the grass pad from sticking to the cage floor.
Egg Collection-husbandry
For general husbandry we use a box filled with sand (Quikrete) plus vermiculite (2:1). Moisten the mix lightly at first, stir to incorporate moisture down to the bottom of the box, and add another small drizzle. The mix shouldn’t be soaked. A box is left in a cage of adults for the weekend, then covered and incubated for 18+ days in a drawer in the husbandry room. The covers usually have several needle-sized holes poked through them for a tiny bit of air flow. Even with that bit of air, the boxes generally don’t desiccate-we don’t water them during incubation. When nymphs begin to hatch, the sandbox is placed in a cage with a grass pad and the lid removed. Newly emerged nymphs seem to be okay confined in the sandbox for less than day provided there’s space between the sand and the lid. Once nymphs are added to a cage, we drape the entire cage with a sheet of plastic to help keep the bugs from drying out. The plastic stays for 1-2 weeks.
Egg collection-pods
We use the same boxes as for husbandry, but they’re filled only with sand (Pavestone). This sand has been sifted through sieves (#25 on top, #30 on bottom) first to leave granules that will be able to be washed away from collected egg pods-see Embryo Injection protocol.
Cages
We settled on the ReptiBreeze and Nano Breeze (Zoo Med Labs) cage after numerous attempts at raising hoppers in other containers. BugDorm insect cages were wonderful to use, but the grasshoppers easily chewed holes in the mesh walls; butterfly cages would likely see the same result. Plastic containers from Carolina Biological worked well for only a short period of time and then the animals died, likely from lack of circulation or from difficulty during molting without a rough surface on which to help shed their skin.
Access to the Zoo Med cages is by a gate which doesn’t provide good security in keeping grasshoppers in, so we created fabric sleeves to fit into the gate space of the ReptiBreeze and into the floor space of the Nano Breeze. Two fabrics have been put to the test: Duck Canvas and Outdoor Fabric (from Joann Fabrics, listed under Utility Fabrics). Both have so far survived unscathed by grasshopper chewing.
Disposal
We freeze our unneeded pods at -20 degrees and/or autoclave them prior to disposal. Transgenic animals will need to be disposed via appropriate methods outlined at each user’s institution.
Hygiene
Liquid dish soap is used with hot water to soak and wash the grass trays, lids, sandwich boxes, sand boxes, and empty cages. Cleaning spray (Lysol) is used on surfaces within the feeding room. Pine Sol is used on the floor. Our hands are gloved when tending to the cages. It’s a messy job so a lab coat or an old change of clothes might be appreciated. Some persons have noted allergy symptoms while/after dealing with the hoppers and their mess, so we do keep disposable masks on hand.
A ‘Pooter’ (named after the entomologist Frederick William Poos, Jr) is a small vacuum driven container that is ideal for capturing and concentrating locust nymphs for observation and anesthetization. The gentle vacuum suction does not injure the animals.

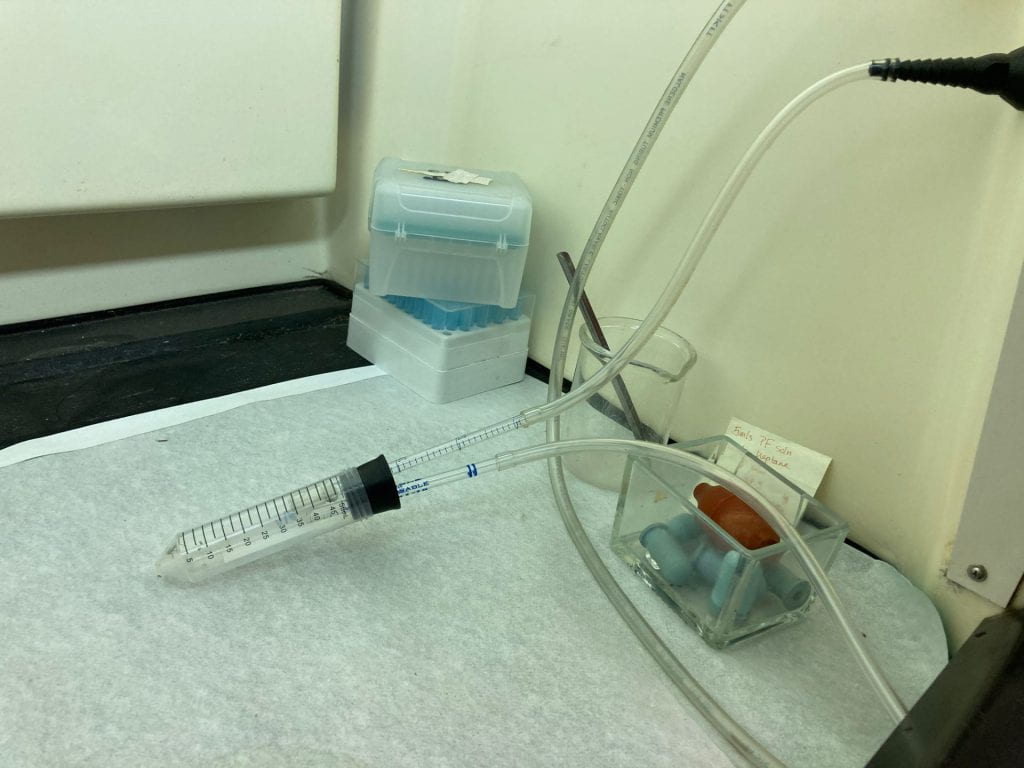

close up of tube chamber 
1st instar locust nymphs in tube
- Choose a rubber bung of sufficient diameter to snugly fit into the desired tube (in this case a 50 ml disposable conical tube).
- Using a bung borer, bore two holes close to the center of the bung to accommodate two lengths of a disposable 1 ml seriological pipet.
- Cut the pipets to the desired length (they should protrude into the tube about an inch, and outside the tube some 2 to 3 inches).
- Cut a square of fine mesh nylon fabric and affix it to one of the pipet ends with a tight fitting piece of tygon tubing. This will form a barrier on the interior of one of the pipets so the vacuumed nymphs are not sucked back into the vacuum line.
- Slide the pipets into the bung holes (glycerol or dish soap can be used as a lubricant). Place a 1 to 2 foot length of tygon tubing on the external openings of the pipets.
- The pooter is now ready to be used; just place the bung in the collection tube, link the nylon-clad tygon tubing line to a vacuum source, and turn on the vacuum fairly high. The nymphs will be easily sucked into the collection tube.
- When collected, turn the vacuum off and carefully remove the pooter from the collection tube. Close the tube with its’ cap.
- For larger instars, increase the diameter of the collection tubing and pipet.