This tutorial includes the following topics:
- Installing your VM
- Setting up your VM
- File sharing
- Enable clipboard sharing
- Creating snapshots
Note for Windows users
Your laptop must have Virtualization enabled in the BIOS settings. These instructions might be helpful.
Installing your VM
Open VitualBox and go to File – > Import Appliance
Select the cloudera-quickstart-vm-5.13.0-0-virtualbox.ovf file you downloaded earlier and click Import. This will take a bit but eventually it’ll install your course VM.
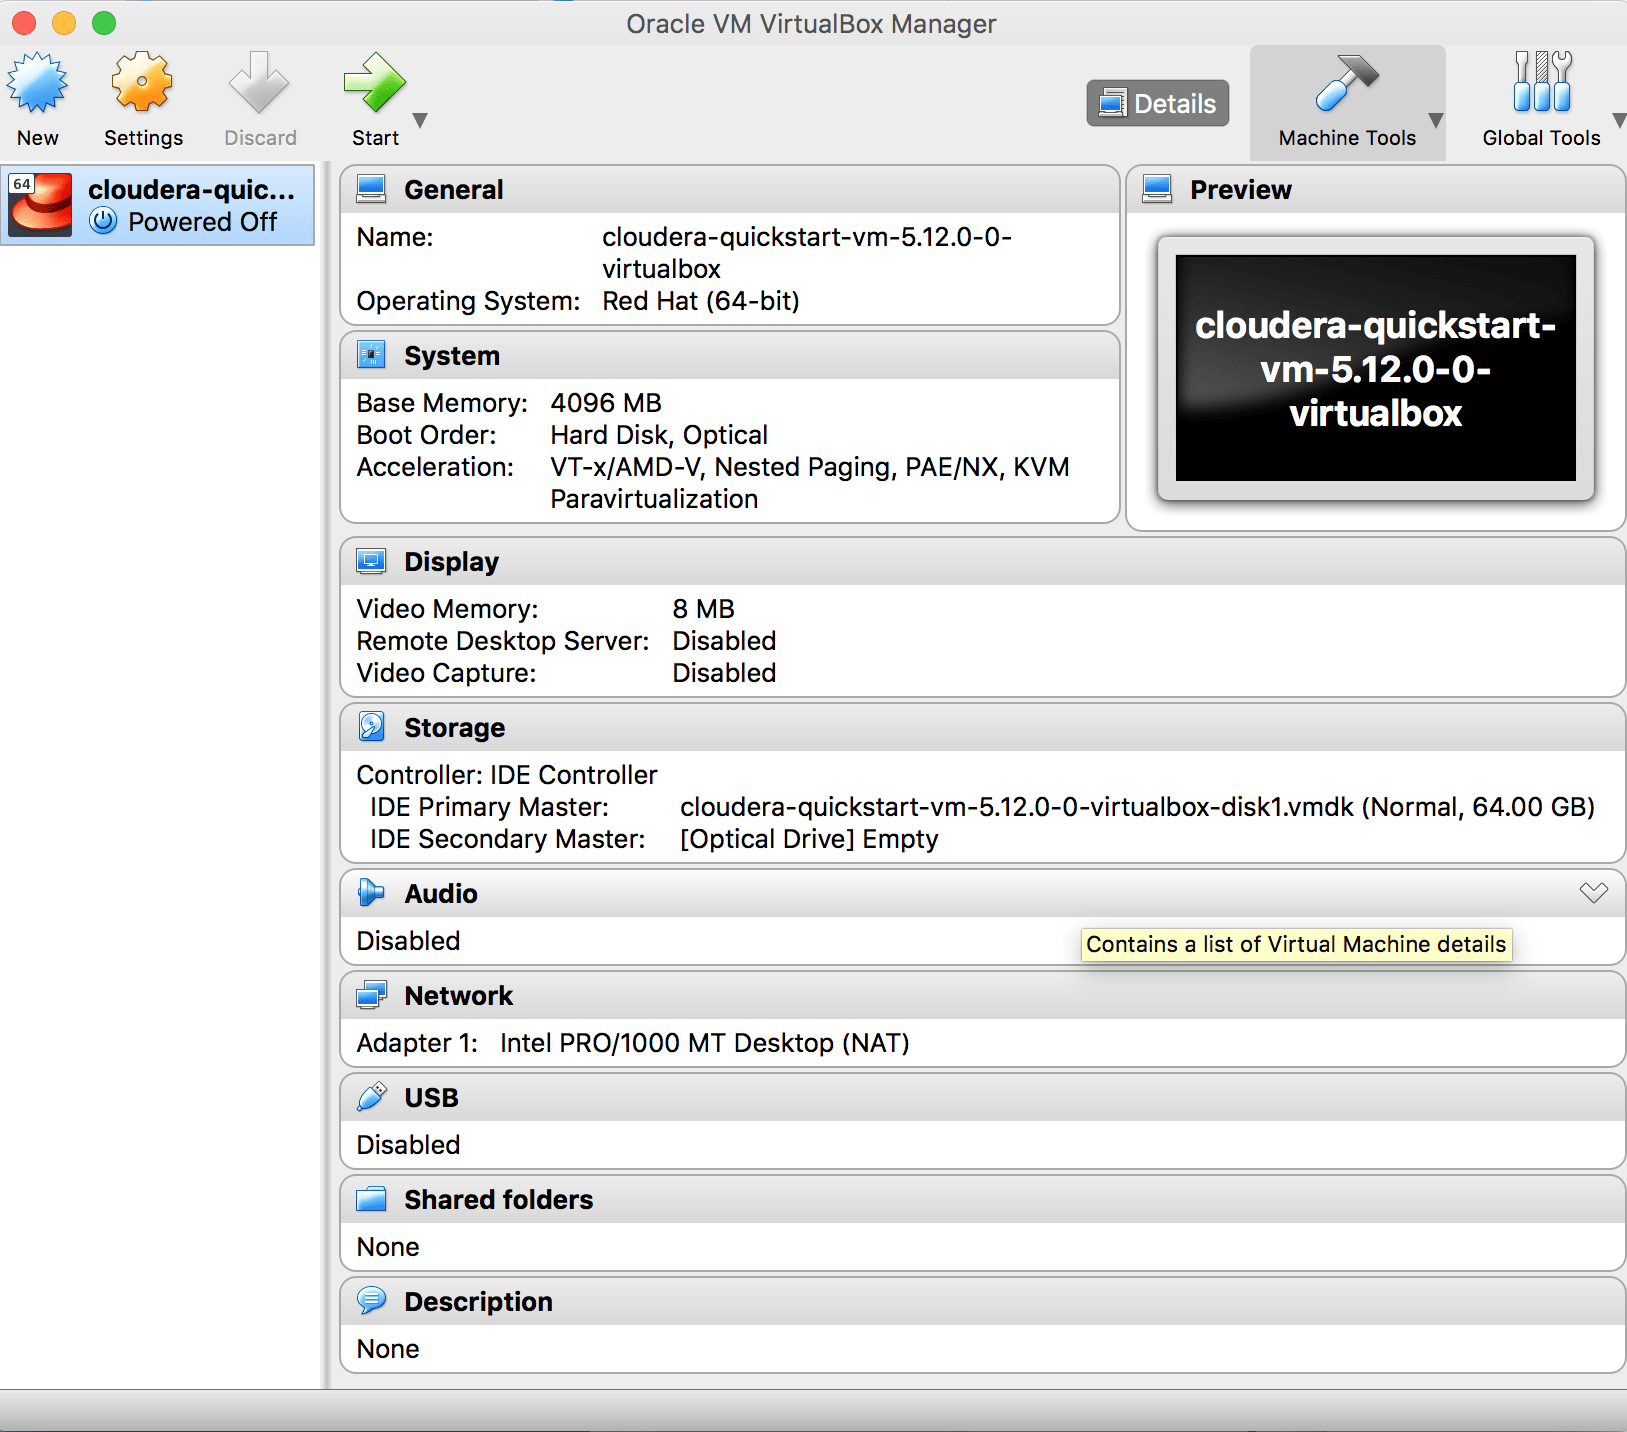
These are the configurations of the successfully configured VM (note that this screen shot was taken when installing version 5.12):
Note that the Base Memory currently says 4096 MB. This is quite a lot and you might run into trouble if your computer or laptop does not have sufficient RAM. If you run into problems while running your VM (the operating system freezes or is very slow), you can try decreasing the base memory under Settings -> System. Note that decreasing the base memory makes your VM run slower… So, it’s a trade-off!
Display Settings: in VirtualBox select Settings > Display > Screen and turn the Scale Factor up (I put it to 200%).
Setting up your VM
Now you can boot your VM. If the screen appears to be frozen, press [ESC].
Once up and running you might want to set up a couple of things.
(1) FILE SHARING (HOST <-> VM)
There are a couple of ways to share files from your host machine to the VM. The most elegant way is to use virtualbox’s file sharing. You can find instructions HERE.
Other solutions could be to use dropbox, wustl box, Google drive, or email.
(2) ENABLE CLIPBORAD SHARING
If you want to be able to share your clipboard enable it in your virtual box settings under
General -> Advanced -> Shared Clipboard -> select Bidirectional
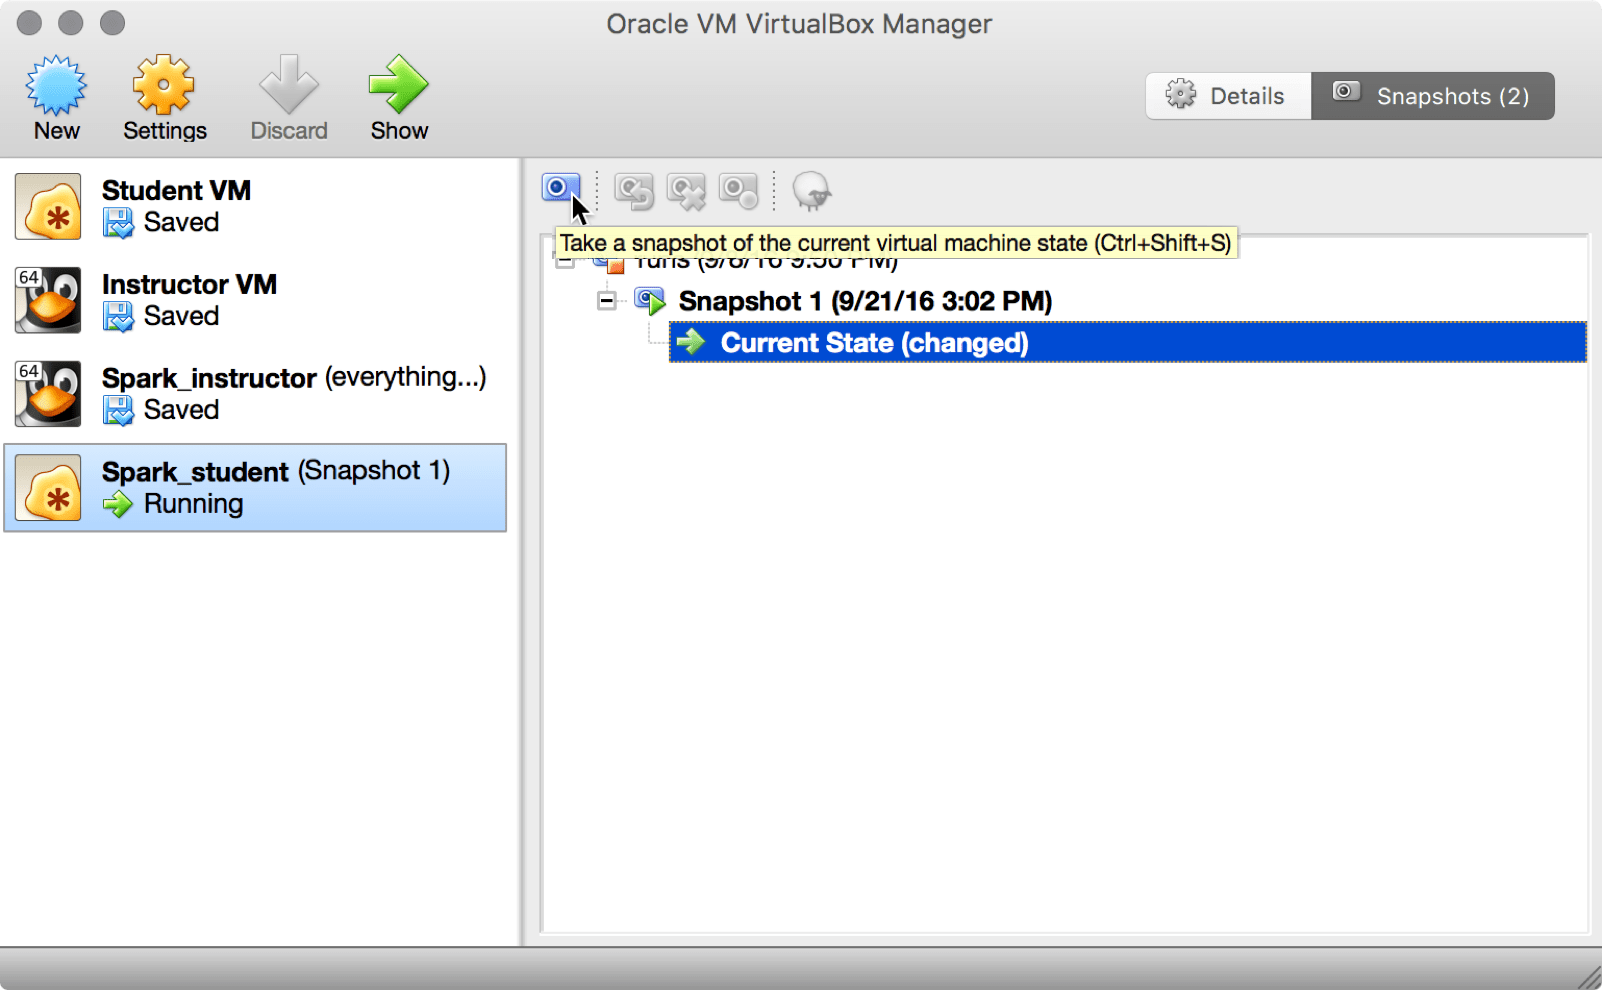
(3) CREATING CLONES OR SNAPSHOTS
It is advisable to frequently create backups of your VM. We can do that in virtualbox via clones or snapshots. Clones are standalone files that can be stored on an external hard drive. Snapshots will take up storage space on your host machine. Create a clone/snapshot every 1-2 weeks!
Click on snapshots in the upper right corner, then use the camera button for snapshots:
or the sheep button to create a clone:
